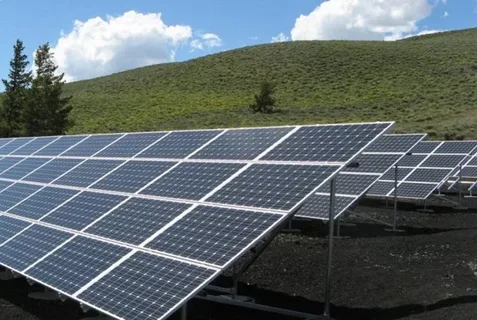
When designing a solar power system, one of the most crucial factors to consider is shading. Even small patches of shade can dramatically reduce your system’s efficiency, lowering your overall energy output and return on investment. The optimal solar array isn’t just about choosing high-quality panels—it’s about placing them where they can capture as much sunlight as possible throughout the day and year.
Understanding how shading impacts solar efficiency, and how to design around it, can make the difference between an average installation and a truly high-performing Commercial solar Derby one.
The Science Behind Shading and Solar Output
Solar panels work by converting sunlight into electricity. When even a single cell on a panel is shaded, the entire panel’s output can drop because the cells are connected in series. Think of it like a chain—if one link weakens, the whole system suffers.
This effect is called “mismatch loss,” and it’s one of the most common reasons why a solar system doesn’t perform as expected. Even light shading from nearby trees, antennas, or roof fixtures can cause noticeable drops in efficiency. In extreme cases, shading across multiple panels can reduce total system performance by 20–40%.
Common Sources of Roof Shading
A detailed shading analysis helps identify and minimize obstacles that could block sunlight. The most frequent culprits include:
-
Trees and foliage – Tall trees near the roof can cast moving shadows that change throughout the year.
-
Chimneys and skylights – Roof fixtures may block sunlight for part of the day.
-
Neighboring buildings – Especially in urban areas, nearby structures can reduce exposure.
-
Antennas and satellite dishes – Small objects can still cast narrow but significant shadows.
-
Seasonal changes – In winter, the sun sits lower in the sky, causing longer shadows.
Identifying these factors early helps your installer position panels for maximum exposure.
Shading Analysis: Measuring the Impact
Before installation, professionals perform a solar site survey to measure shading patterns across your roof. Using tools like a solar pathfinder, drone imaging, or 3D modeling software, they evaluate how shadows shift hourly and seasonally.
This analysis produces a shade report that shows:
-
Areas of high solar exposure (ideal for panels).
-
Partial shading zones (where optimizers may be used).
-
Low-exposure areas (typically avoided).
Understanding this data allows for a system design that balances aesthetics, practicality, and performance.
Designing Your Optimal Array
Creating an optimal solar array means making strategic decisions about panel placement, orientation, and technology. Here’s how professionals achieve that balance:
1. Maximize Sunlight Exposure
The best-performing panels face south (in the Northern Hemisphere) at an angle roughly equal to your latitude. Roofs facing east or west can still work efficiently, though they produce slightly less energy overall.
Installers aim to position panels so that none are shaded between 9 a.m. and 3 p.m., when sunlight intensity is at its peak.
2. Use String Layouts Wisely
Panels are usually wired in series strings—where shading on one panel can affect others in the same string. By grouping panels with similar sunlight conditions together, installers minimize mismatch losses and maintain consistent performance across the array.
3. Consider Module-Level Power Electronics (MLPEs)
Technologies like microinverters and power optimizers have revolutionized solar design. These devices allow each panel to operate independently, so shading on one panel doesn’t drag down the performance of the others.
-
Microinverters convert DC to AC power at each panel, maximizing efficiency under variable light conditions.
-
Power optimizers work with a central inverter but still manage power output per panel.
These tools are particularly valuable for homes with partial shading from trees or complex roof layouts.
4. Strategic Panel Spacing
Panels should be spaced to avoid one casting shadows on another—especially on flat roofs or angled racks. A general rule is to maintain enough distance so that the front edge of one panel doesn’t shade the next during the lowest winter sun angle.
5. Trim or Remove Shading Sources
In many cases, a simple tree trimming can significantly increase system efficiency. Homeowners should work with professionals to prune branches safely and maintain clearance from overhanging vegetation.
6. Use Bypass Diodes
Modern solar panels include bypass diodes, which allow current to flow around shaded cells instead of through them. This reduces the negative impact of partial shading, protecting overall system performance.
Seasonal and Daily Shading Variations
It’s easy to overlook that the sun’s position changes throughout the year. In summer, it rises higher, while in winter, it stays lower—causing longer shadows. A well-designed solar array accounts for these shifts by evaluating solar access year-round.
Similarly, shade can vary daily. Morning shadows from trees or evening shading from nearby structures may only impact output for short periods. Installers use this information to calculate your expected solar yield, ensuring realistic performance estimates.
Monitoring and Adjusting for Optimal Efficiency
Once installed, your solar monitoring system tracks energy production across panels. If one panel consistently underperforms, it could indicate a new shading issue—like growing trees or accumulated debris.
Homeowners should check their performance data regularly and schedule maintenance if sudden drops occur. Some monitoring platforms even alert you automatically when output falls below expected levels.


